Linking and Embedding
We always want to be able to trace originals used to generate new files. To do this, all files used must be saved in CEWE MediaAssets and the resulting files must be linked to the original. This helps us in two ways:
- Compliance: in the event of changed or withdrawn usage rights, we can find all files again in which corresponding images have been processed.
- Work simplification: the original file can always be found so that it can then be used for further processing.
So there are 2 questions:
Where does a file come from? Keyword Evolution tree
What is in a file? - Keyword Embedded objects or files
Below please see the necessary steps.
Translated with DeepL.com (free version)
Linking source files to resulting files
How we automatically link files and make them visible in the evolution tree.
In the context of image rights, we want to generate links between source files and resulting files so that related files can be found at any time. To create those links and make them visible In the evolution tree of an asset, a file must either
be saved directly in Photoshop (applies to PSD, PSB, Tiff)
or exported via CEWE export plug-in. (applies to JPEG, PNG and WebP)
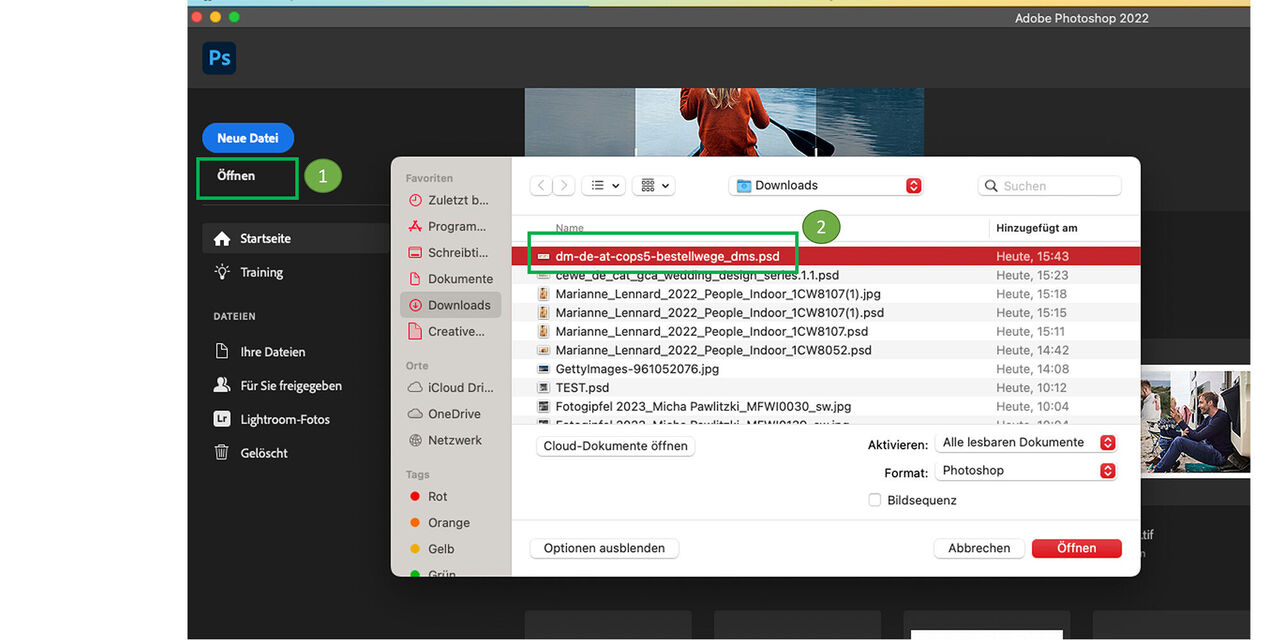
You have selected and downloaded an original Photoshop file and opened Photoshop.
Go to "Open" in Photoshop
and select the previously downloaded file
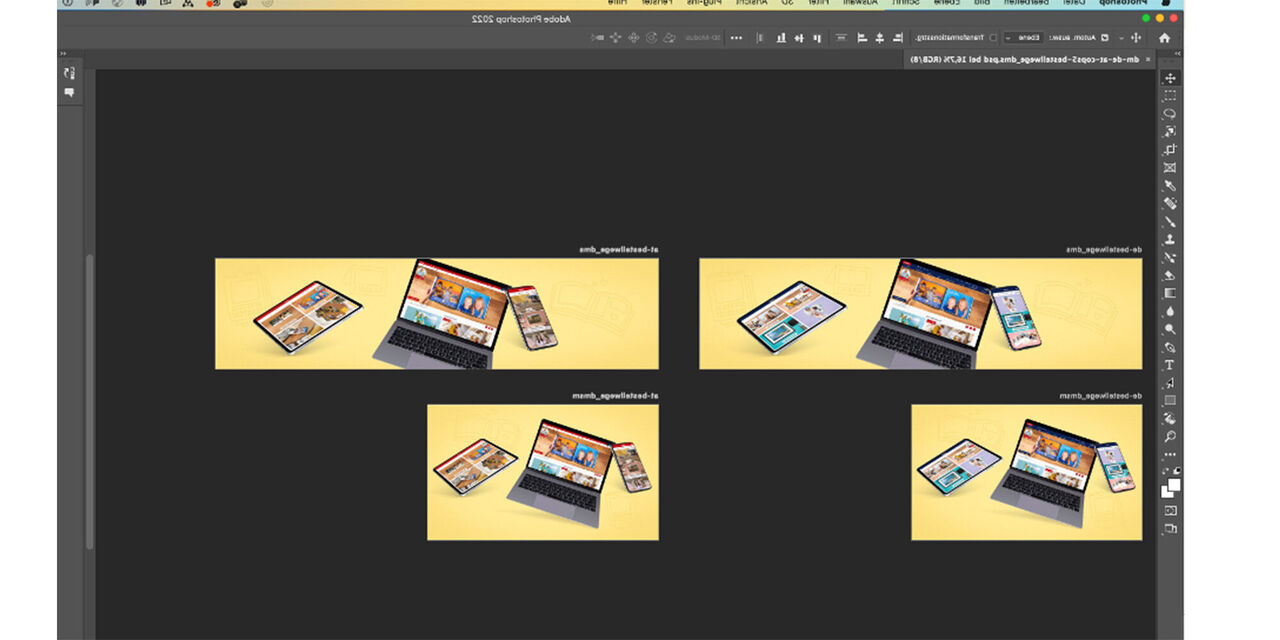
Display of the complete file in Photoshp

You would like to generate a JPEG for example. In this case make use of the CEWE Export Plug-in.
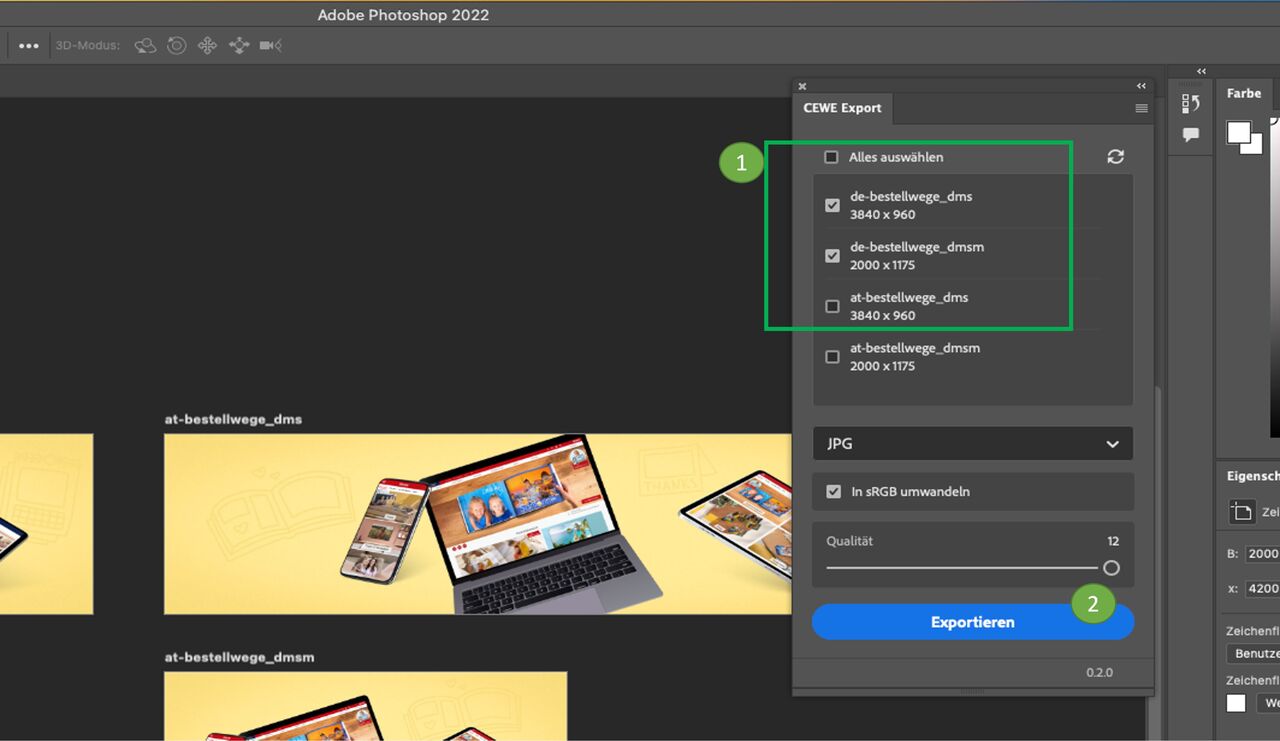
Select the elements you want
Go to "Export"
File names for the 2 JPEGs have been created automatically
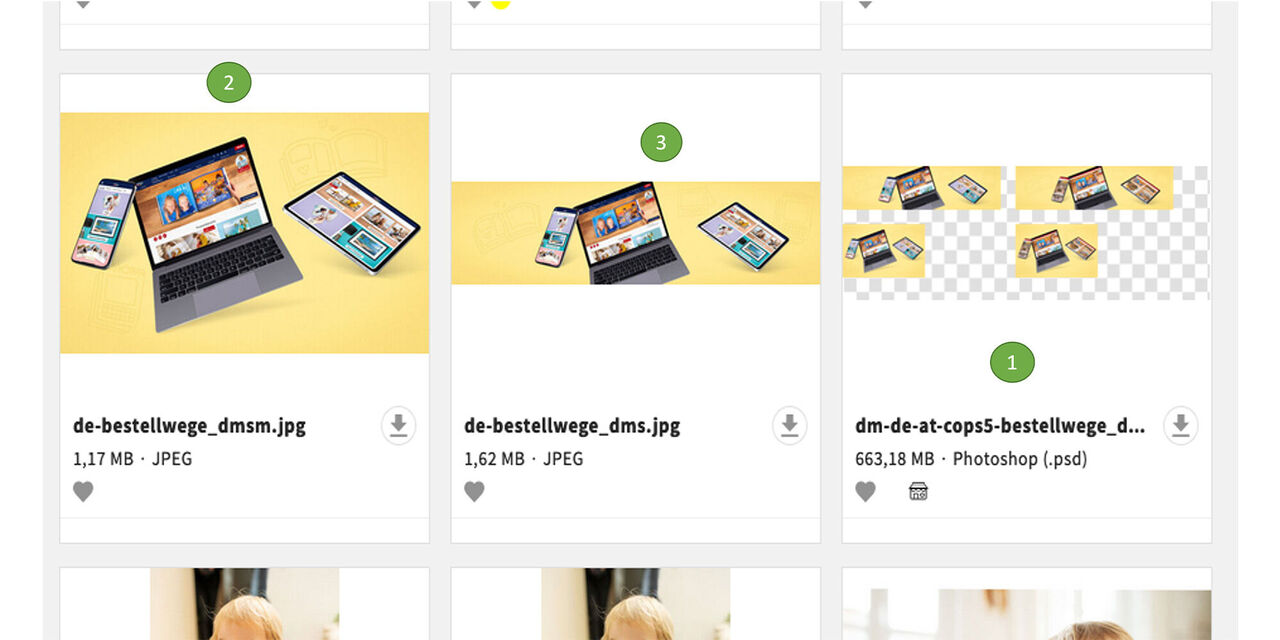
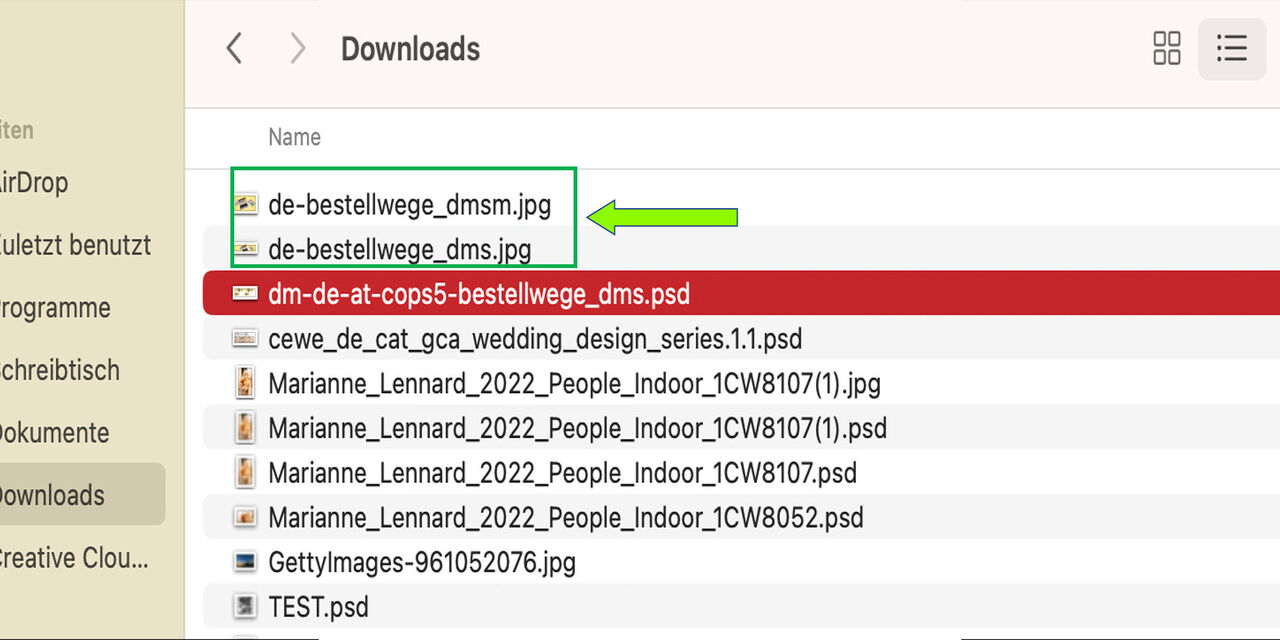
After uploading the JPEGs you see all the 3 files in CEWE MediaAssets:
- Original PSD file
- new uploaded JPEG 1
- new uploaded JPEG 2
In all three files you can now find the corresponding files by checking the evolution tree - see next tab.
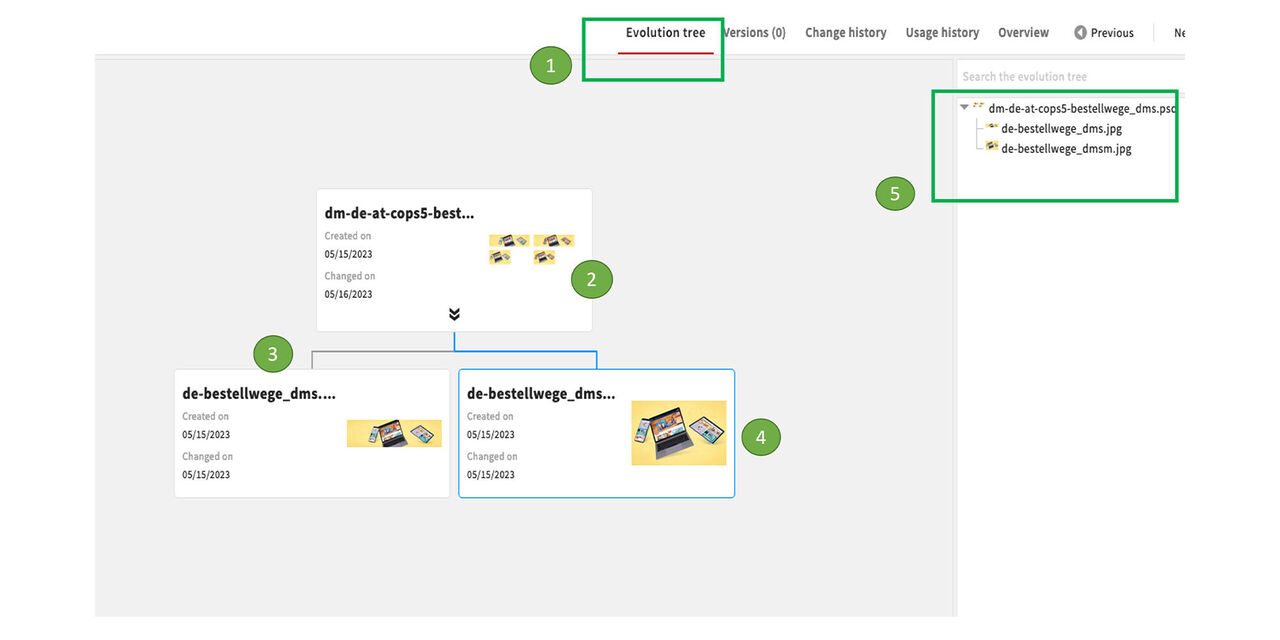
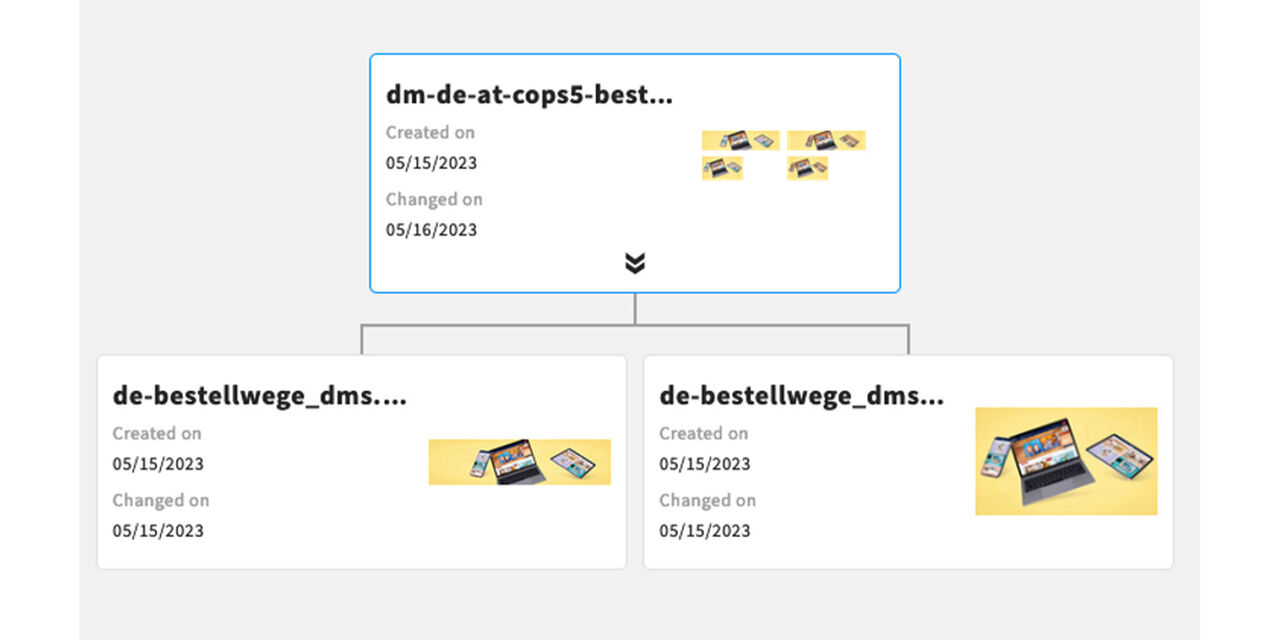
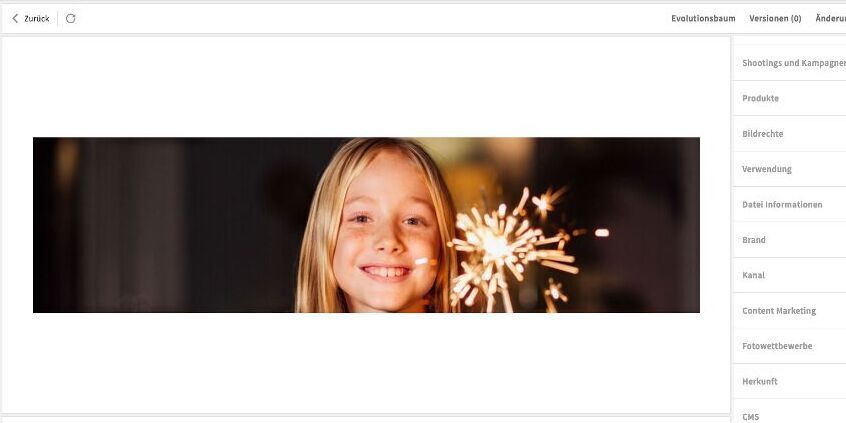
Now open one of the assets in the Detail View.
- Go to the evolution tree
- Here you can see the original file
- Here you can see the JPEG 1
- Here you can see the JPEG 2 - this is outlined in blue, it is the asset that you called up
- Here you can search the evolution tree (useful if there are a lot of links)
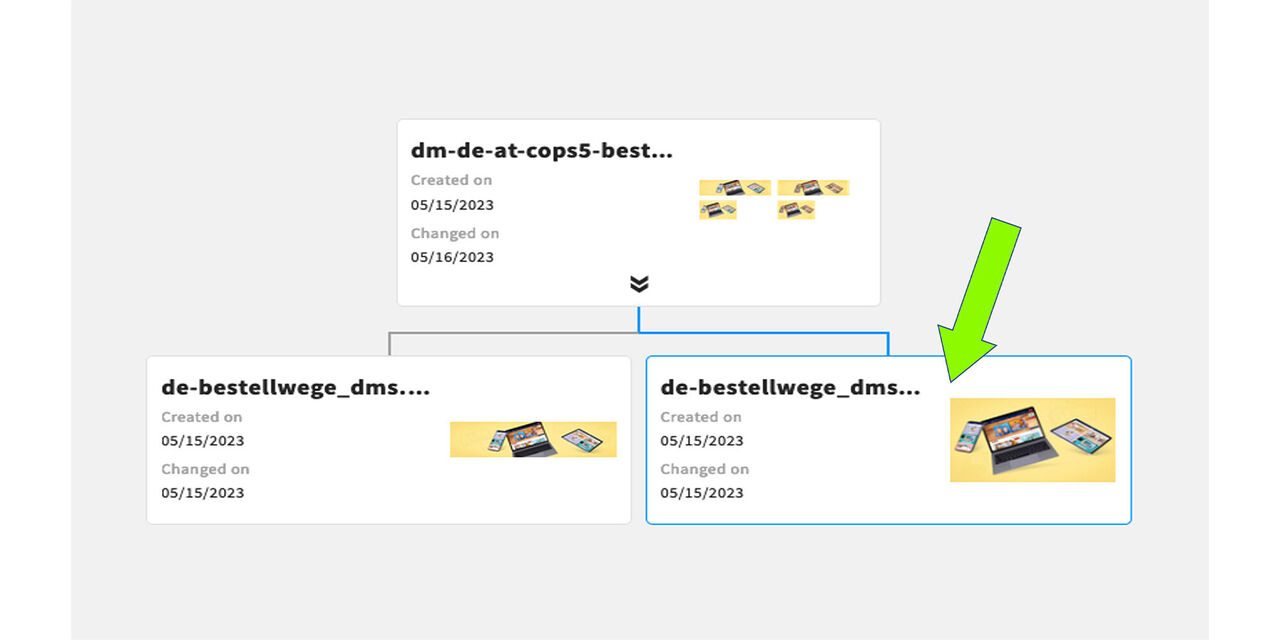
By double-clicking on the image in the evolution tree you can jump to one of the other assets.
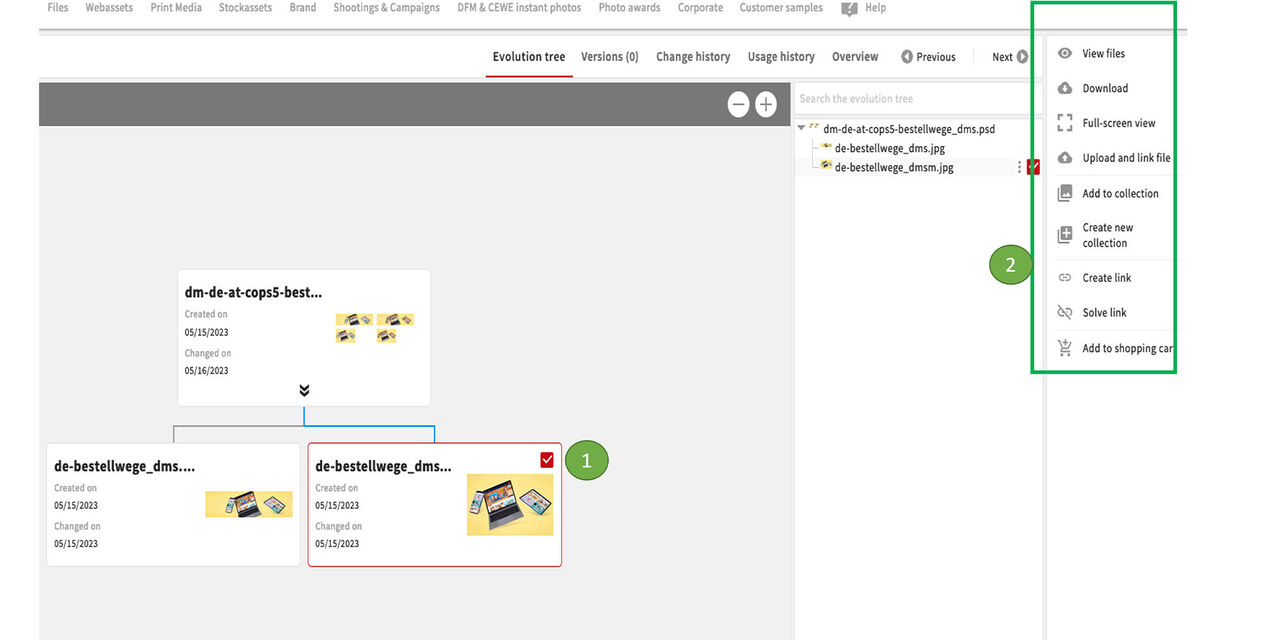
You have more options here:
- Highlight an asset
- The action area becomes active and offers you various functions that you can carry out directly from here
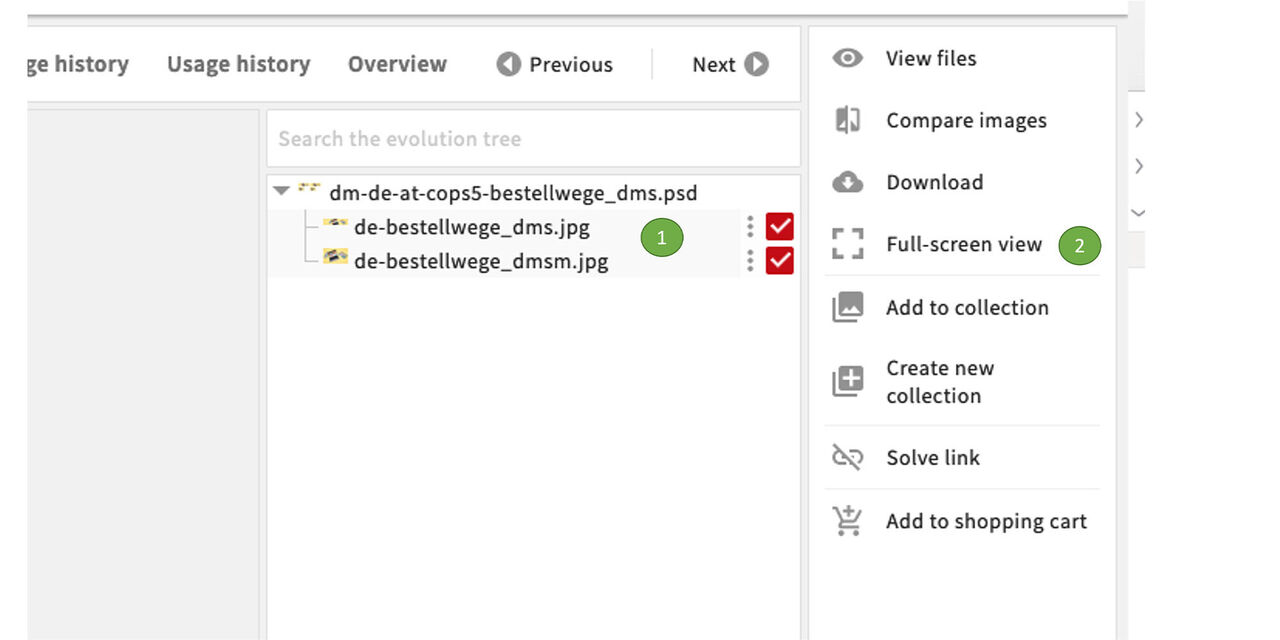
You can also
- select one or more elements and
- display them in full screen without calling up each one individually
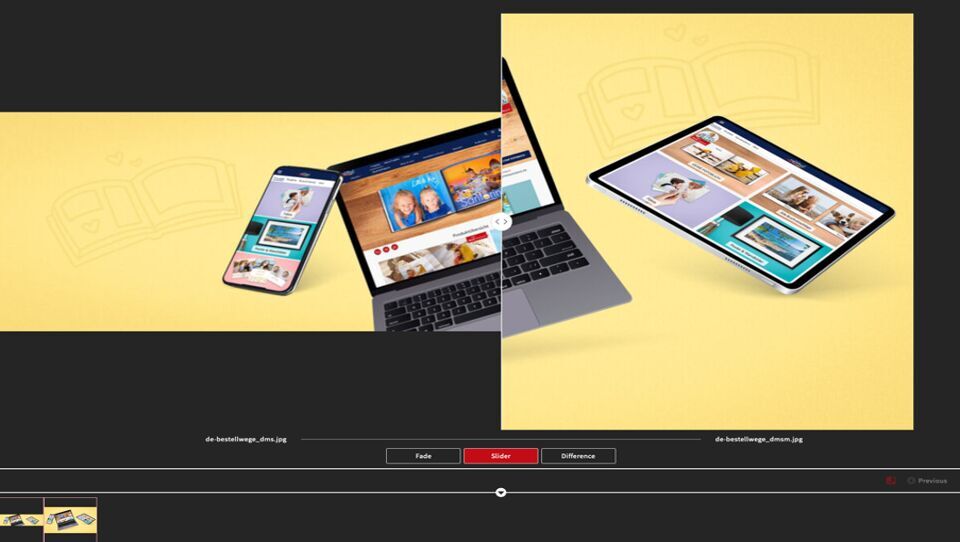
The pinand slider function is also available here in the full-screen view. It might be helpful at this point.
(More about these functions under "Search-Find-View > View")
Linking files contained in a file
What you need to know about creation, appearance and benefits of such links and why we need embedded smartobjects
To enable the linking of files contained in a file, for example in compositions, the following points are mandatory for the working process:
- All image content for compositions must be downloaded from CEWE MediaAssets
- Newly added image content is only inserted as embedded smart objects in Photoshop. The smart objects represents the technical basis for the system to link the files.
- New image content can be inserted in Photoshop files only.
- TIFF files can be used, but must not contain any other image content as the system is unable to recognize it from a TIFF.
Here is an example:
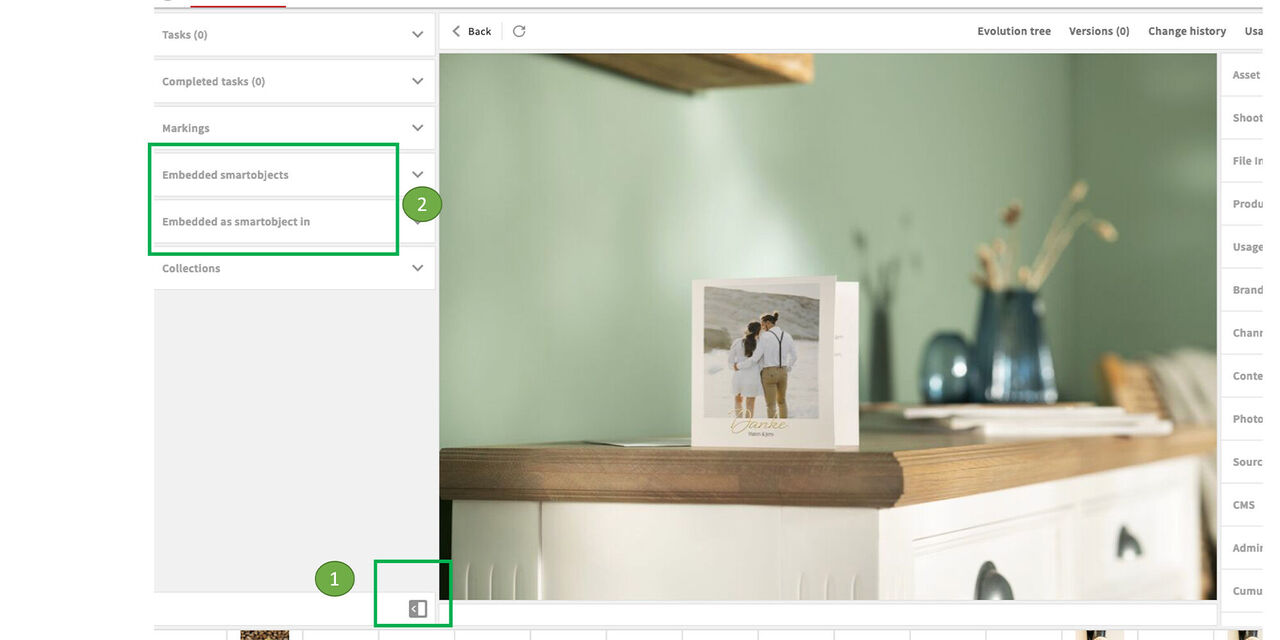
Choose an asset and open the menue on the left.
You can see the sections Embedded smartobjects (file contains such objects) and Embedded as smartobject (file in embedded in another file)
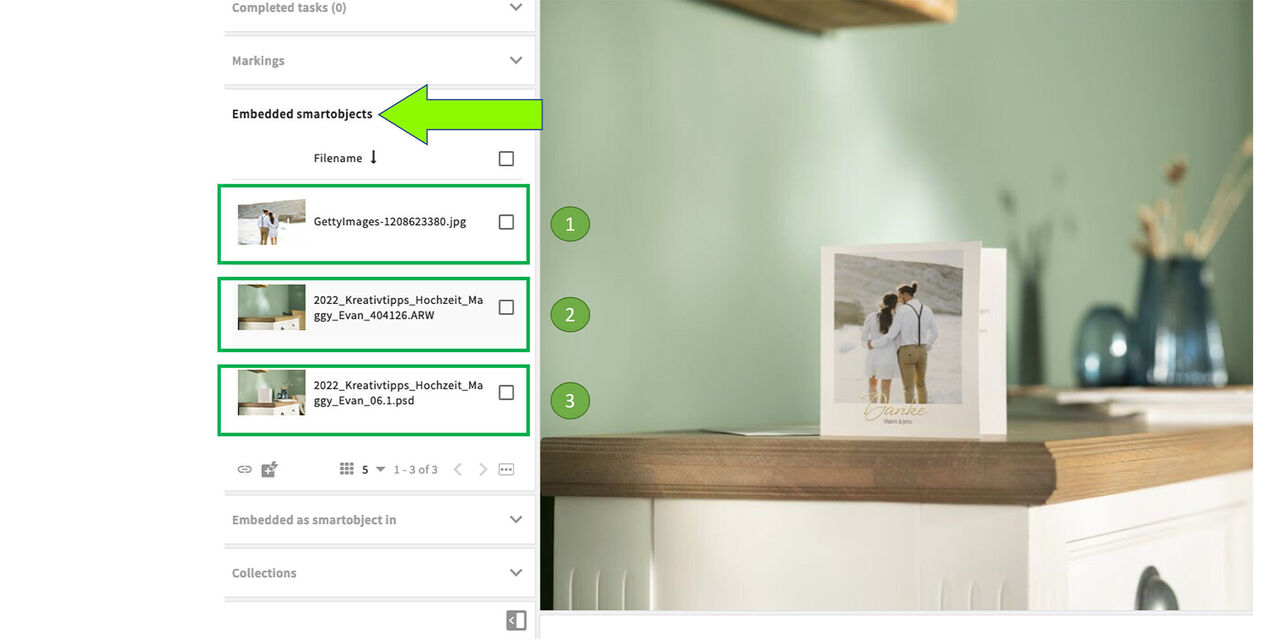
When opening the item Embedded Smart Objects, in this example three linked files appear:
the Getty image featured on the card
the ARW file with empty lifestyle
the PSD without motive
You can also use this function to find required PSD files!
Open the section Embedded Smart Objects now.
There are no linked files available.
So this file is not embedded elsewhere.
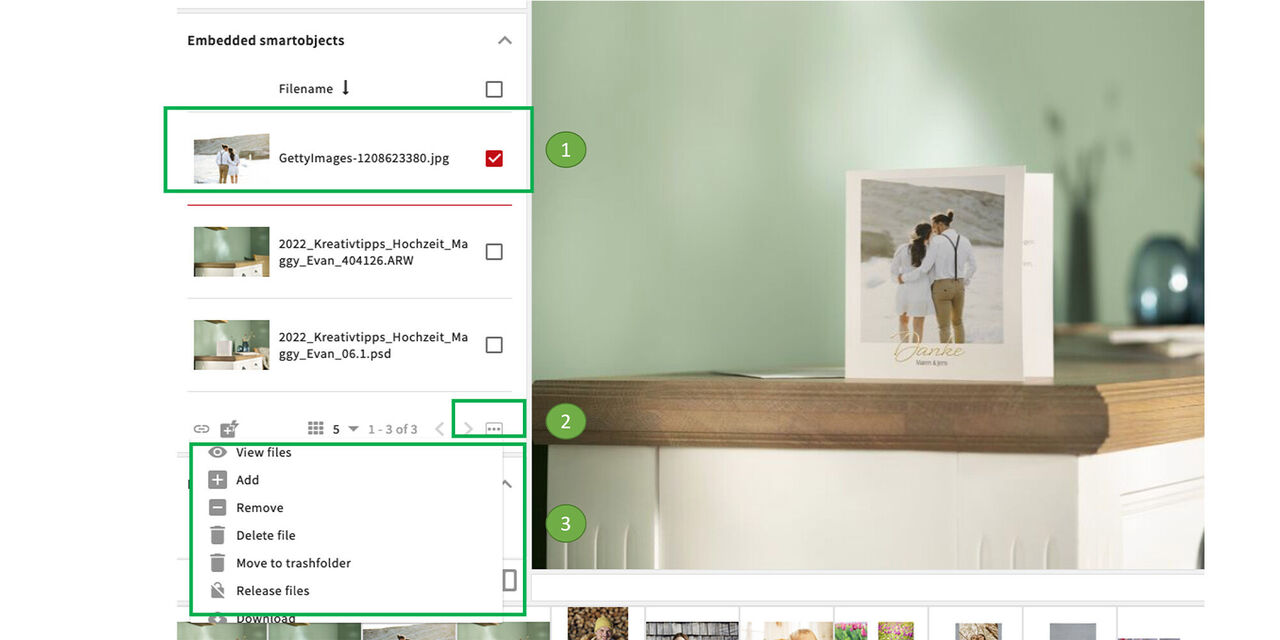
What else can we see or do here?
When marking the Getty image for example
and click on the three dots
an action panel will open and offers diverse functionalities like downloading directly from here.
With a double click you can easily jump into one of the linked files. In this case we called up the Getty image.
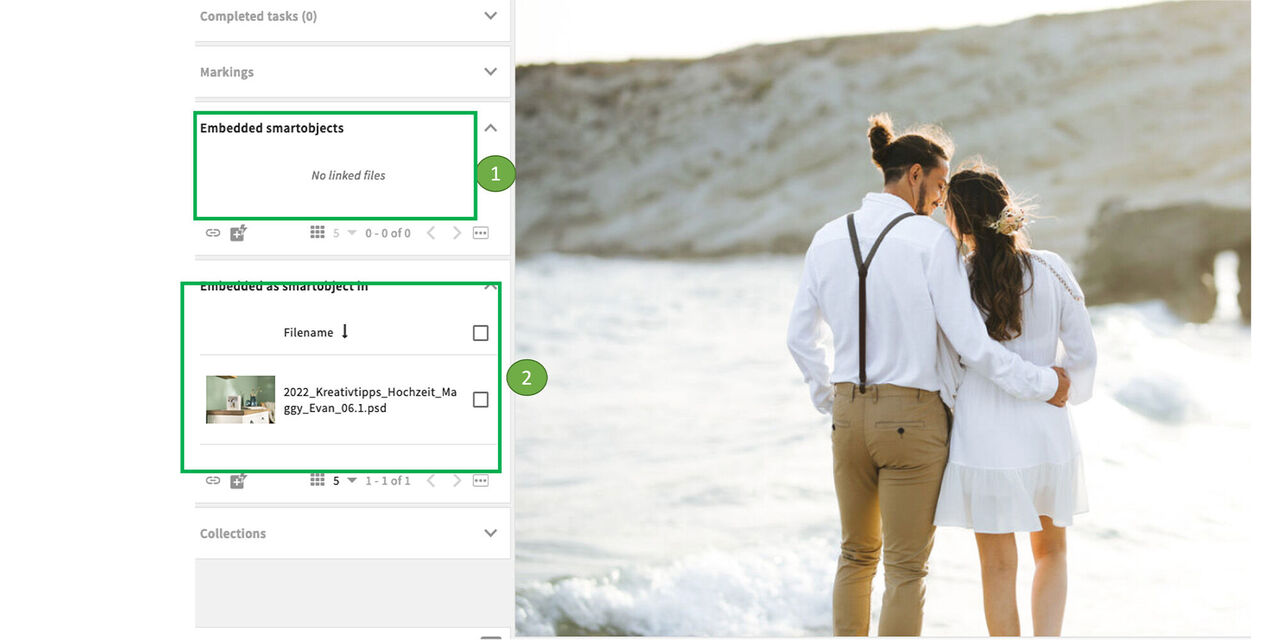
- In this example we do not find any embedded smartobjects
- But when clicking on Embedded as Smartobject you will see that this one has been used in the PSD we saw before.
Conclusion:
So we can not only find the picture in the picture via this link if it should become necessary in a legal context. You as a user can also use this function to find linked files that you need for your work.
Manually created links
In particular cases links can be created and removed manually.
In some cases the manual linking of assets might become necessary, e.g.:
- Linking did not work because processes have not been adhered to
- Asset created and delivered by agencies
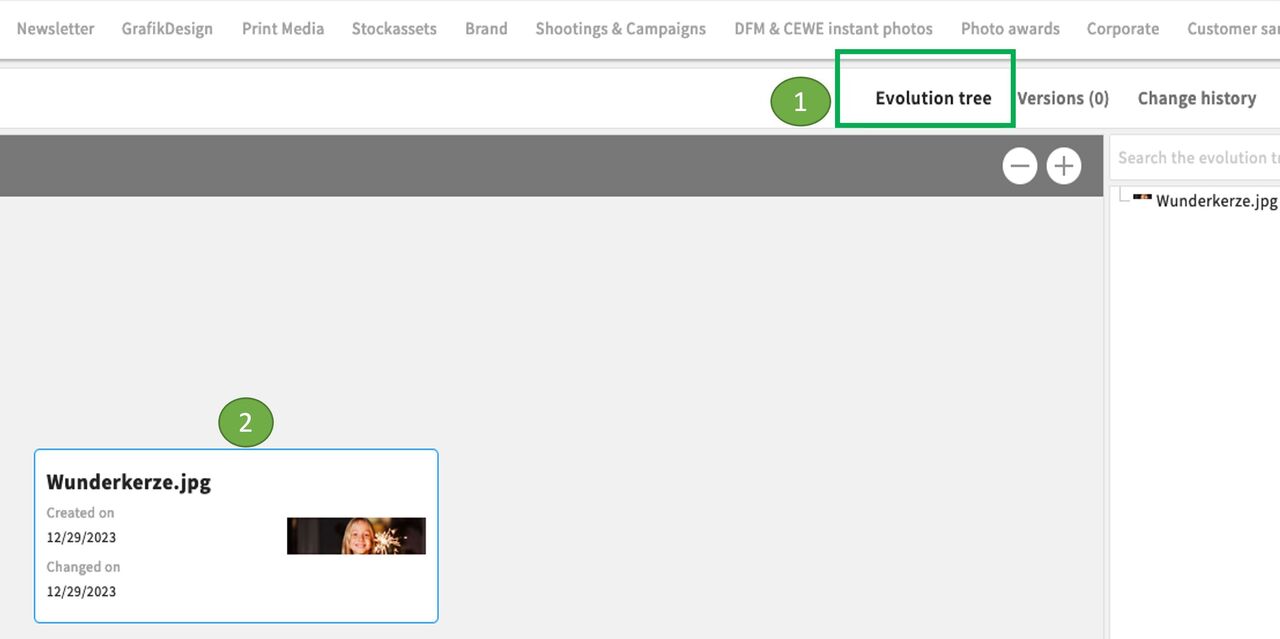
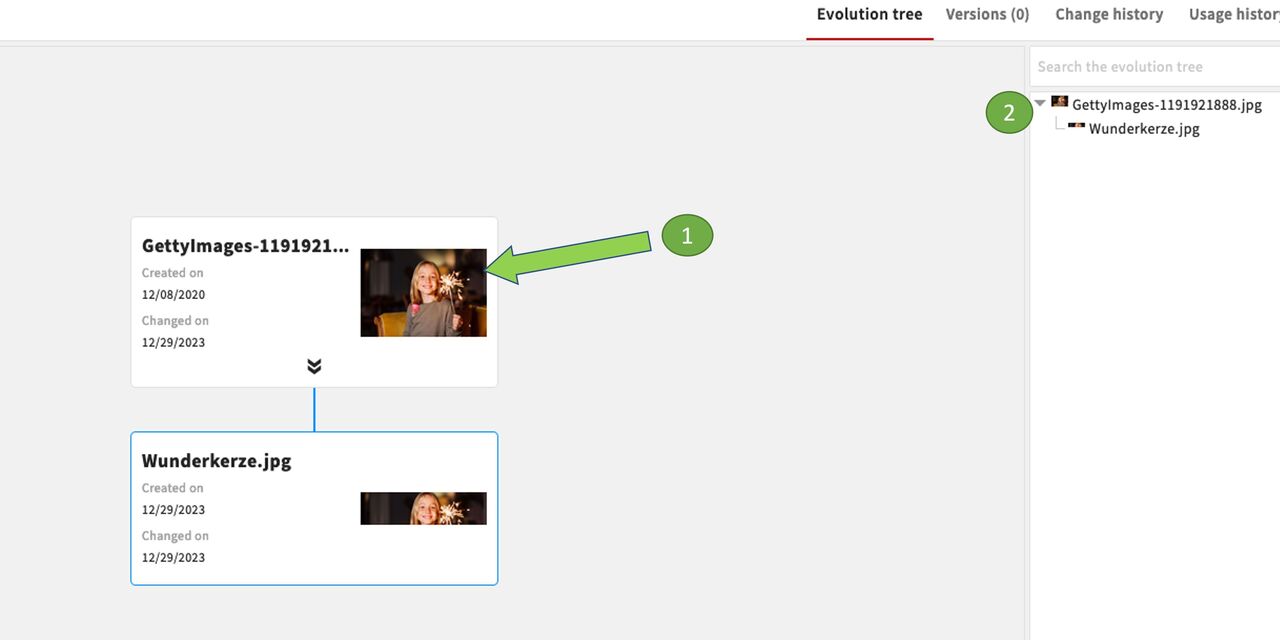
We can check potential linkings in the evolution tree of the image.
In this case we only see a newly created image - without any linkings
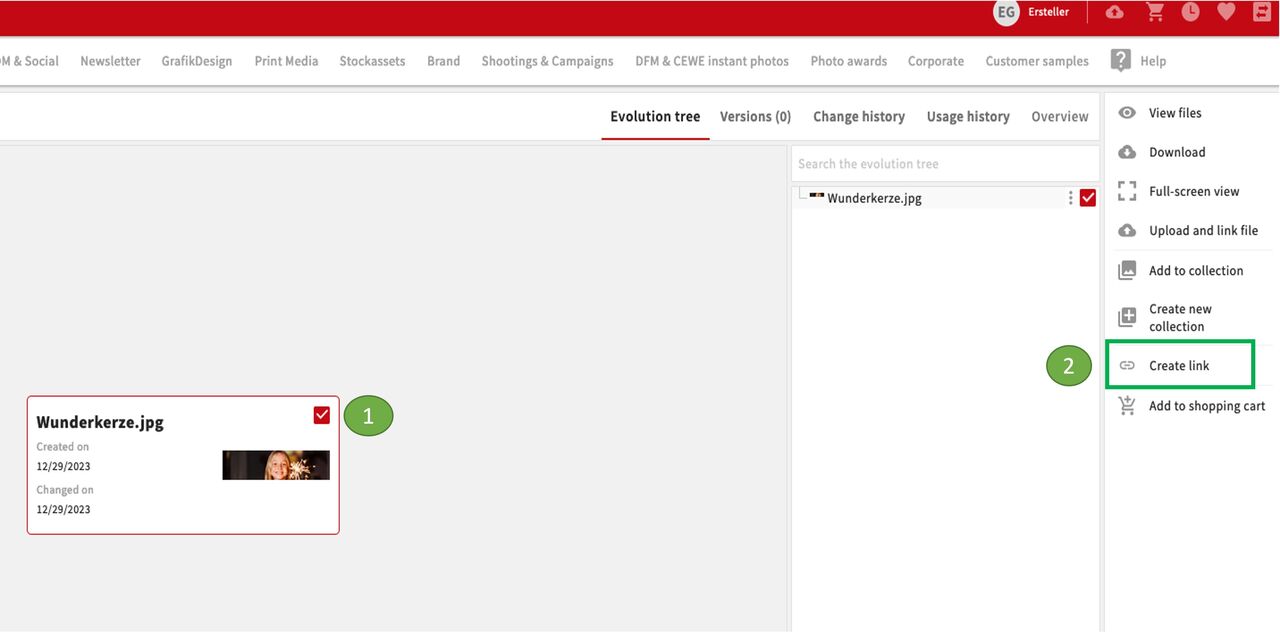
To create the link now manually
we mark the image
and click on Create link
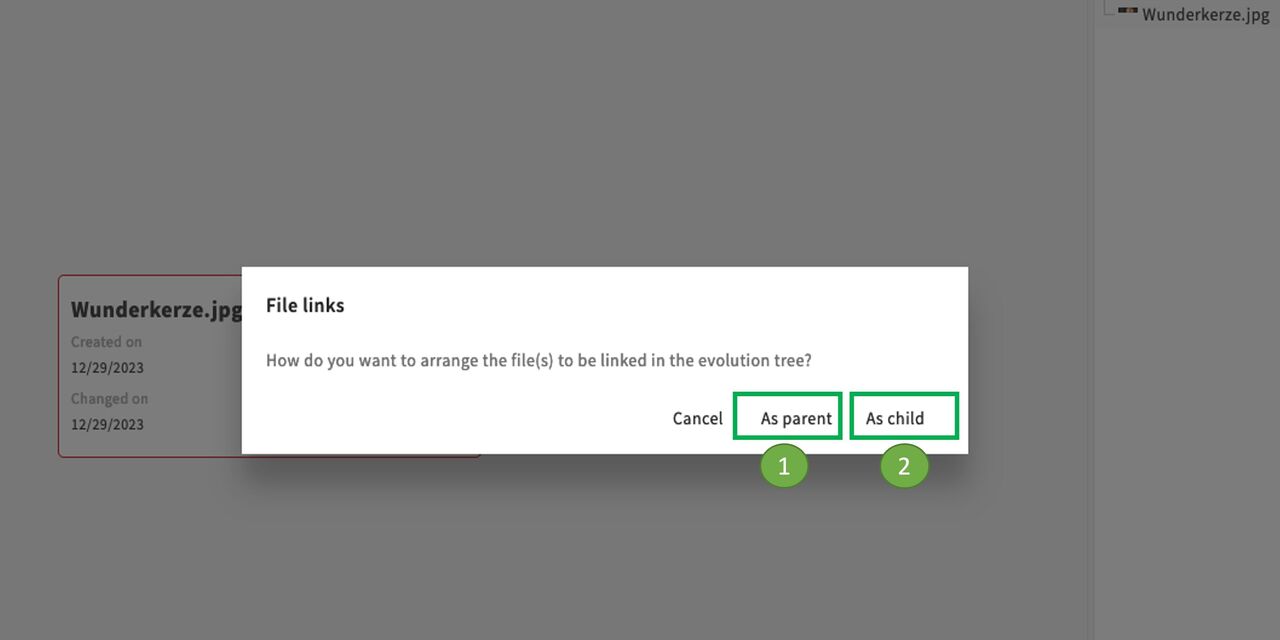
In the next step the system is asking how the image needs to be linked:
- as parent or
- as child
The image we are currently in corresponds to the child element. It was created from an original file, the parent to which we now want to link. If the link was created from the original file, we would select child to link the newly created file.
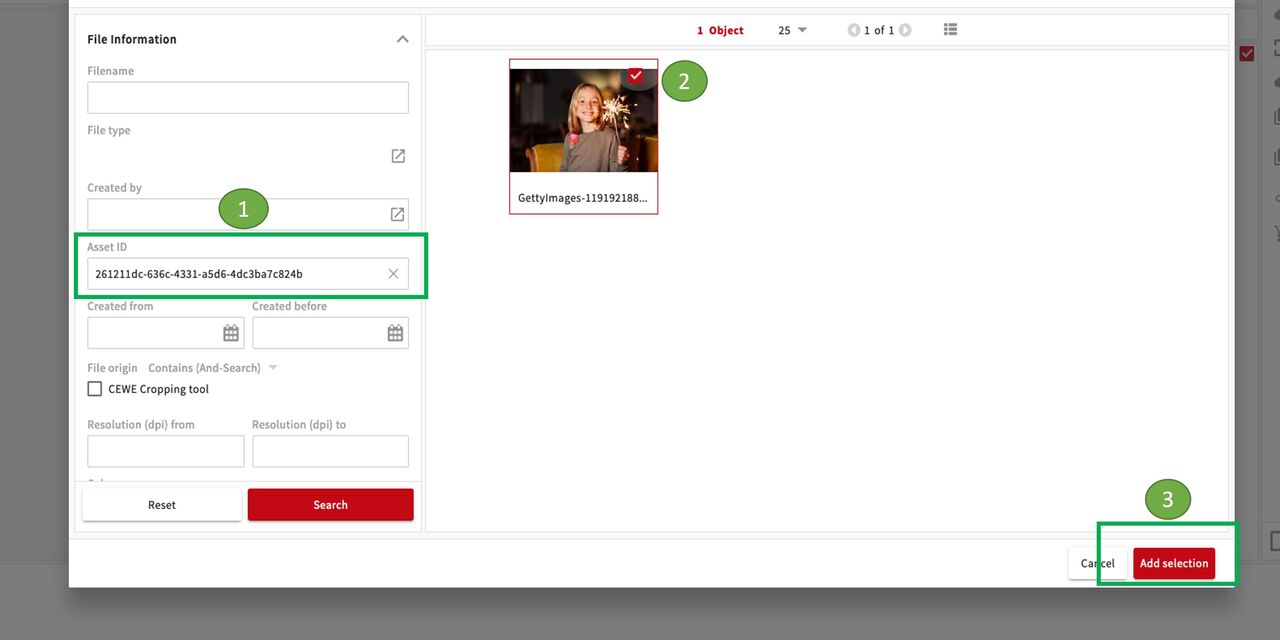
We now call up the original file (here, for example, via the asset ID),
then select the image
and add selection
Done!
The original image - here a Getty image - has been linked to the newly created image as a parent element.
You can see this also in the list at the top right.
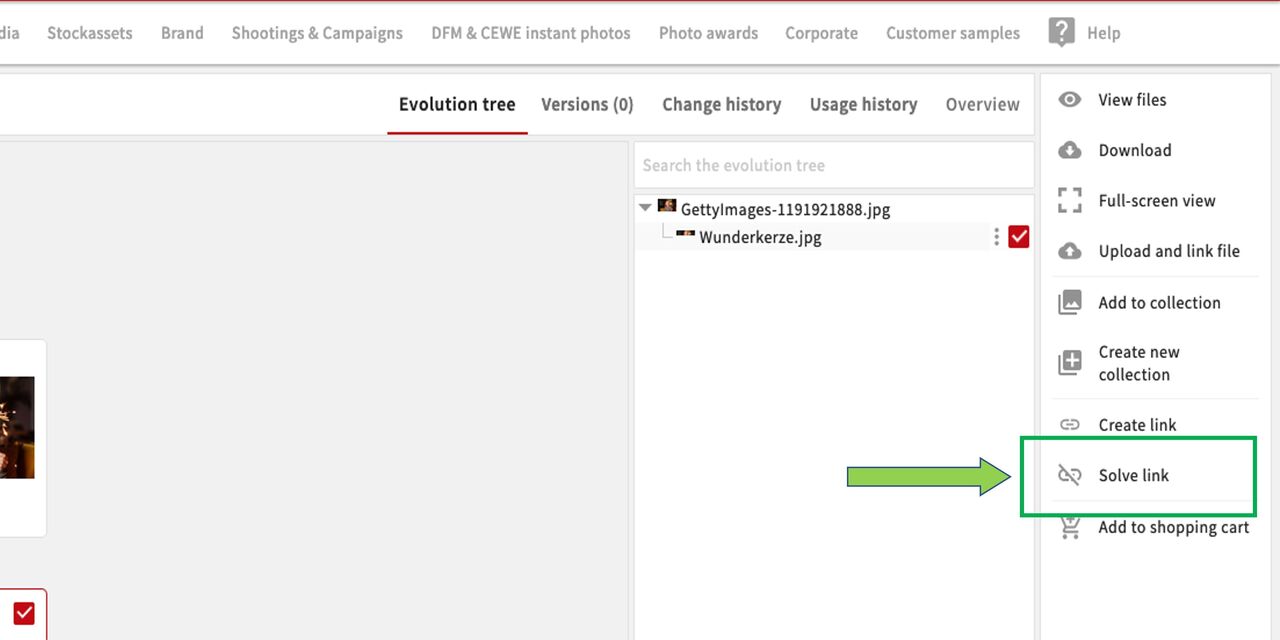
Of course, a link can also be removed again.
If you have simply made a mistake, this can easily be corrected. To do this, select the image in question and click on remove link (incorrectly labeled as "solve link").
A relatively common case is the linking of module templates for web cuts. In this case, an individual template must be created beforehand to prevent linking with the general template. For more information, see the chapter Creating templates from files.
Manual embedding of files
How we handle files that can not be embedded as smartobjects in PSDs
In some cases, objects cannot be embedded directly in the newly created file. In these cases, the files used can be linked or embedded manually.
Typical use cases are:
- Product samples - the samples are usually photographed
- Screenshots - e.g. from a website
- JPEG files - embedding objects is technically not possible
- Files created with the help of other tools, e.g. Canva instead of Photoshop
- Files that are not open, e.g. supplied by agencies or retail partners.
Embedded files
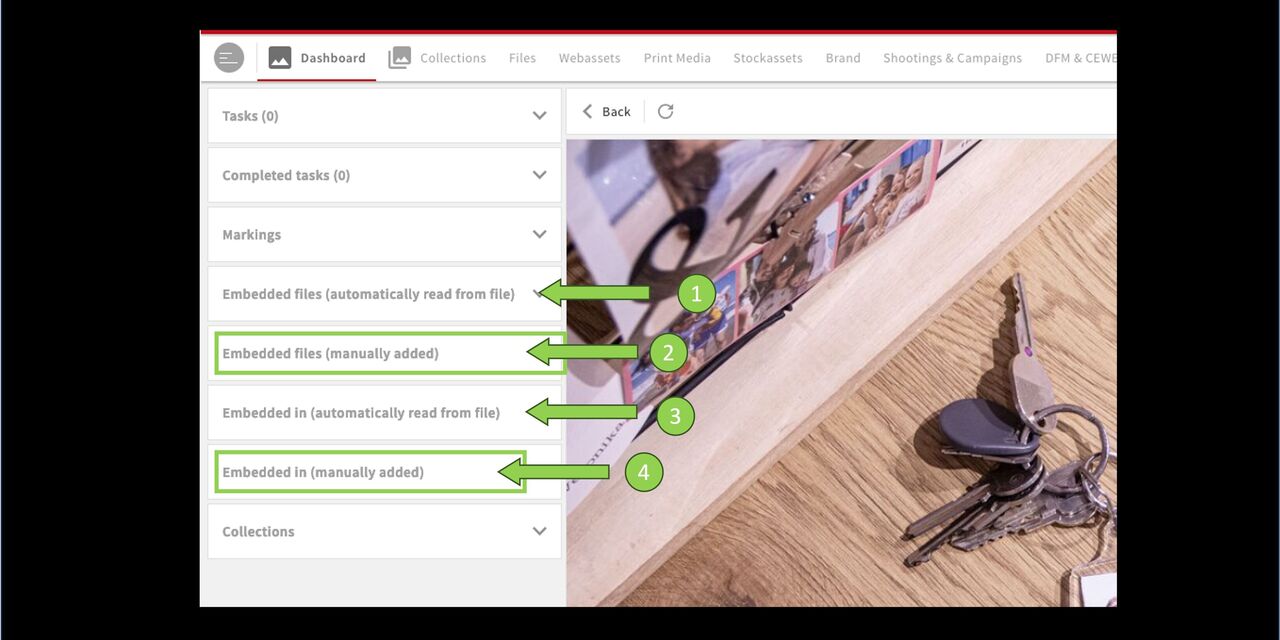
In the detail view of the asset on the left menue, you can find these 4 fields:
- Embedded files (automatically read) - PSD contains embedded smart objects
(former field name embedded smartobjects) Embedded files (manually added) - New for manual use cases as described in Intro
Embedded in (read automatically) - this image is embedded as a smart object
Embedded in (manually added) - New for manual use cases as described in Intro
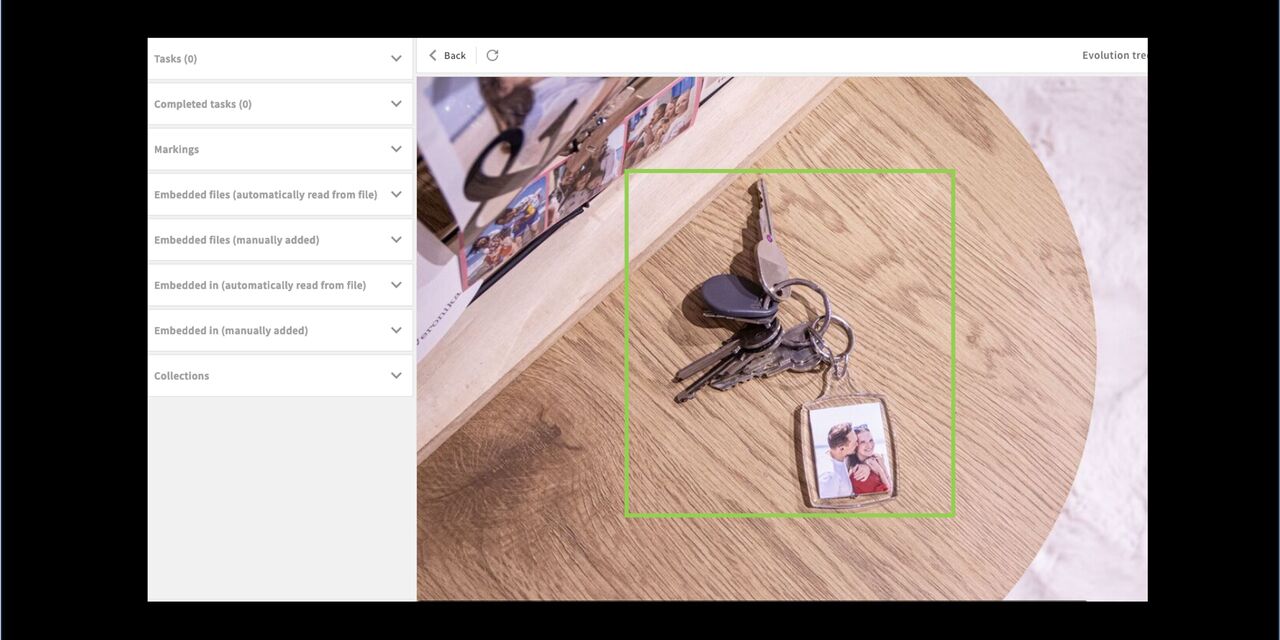
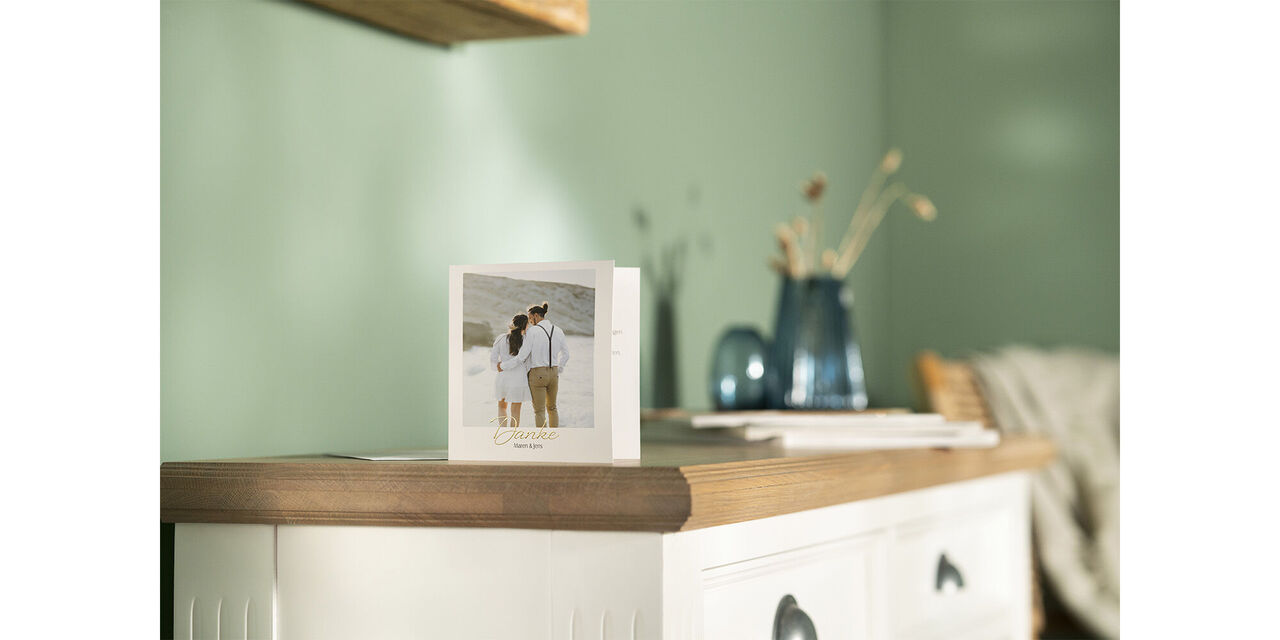
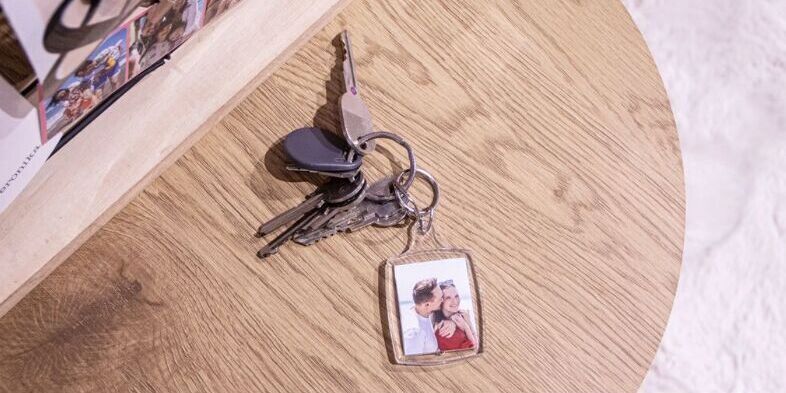
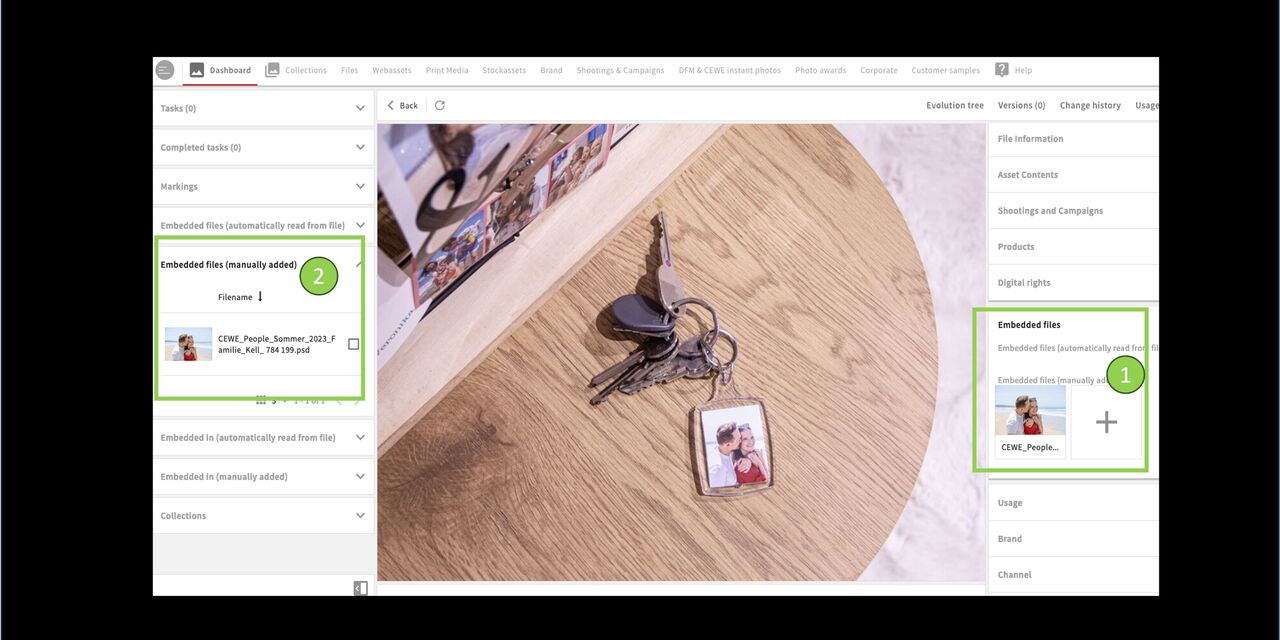
Example product sample
This key fob was photographed as a finished product sample. The shooting image used in it is therefore not embedded as a Smart Object and must be added manually.
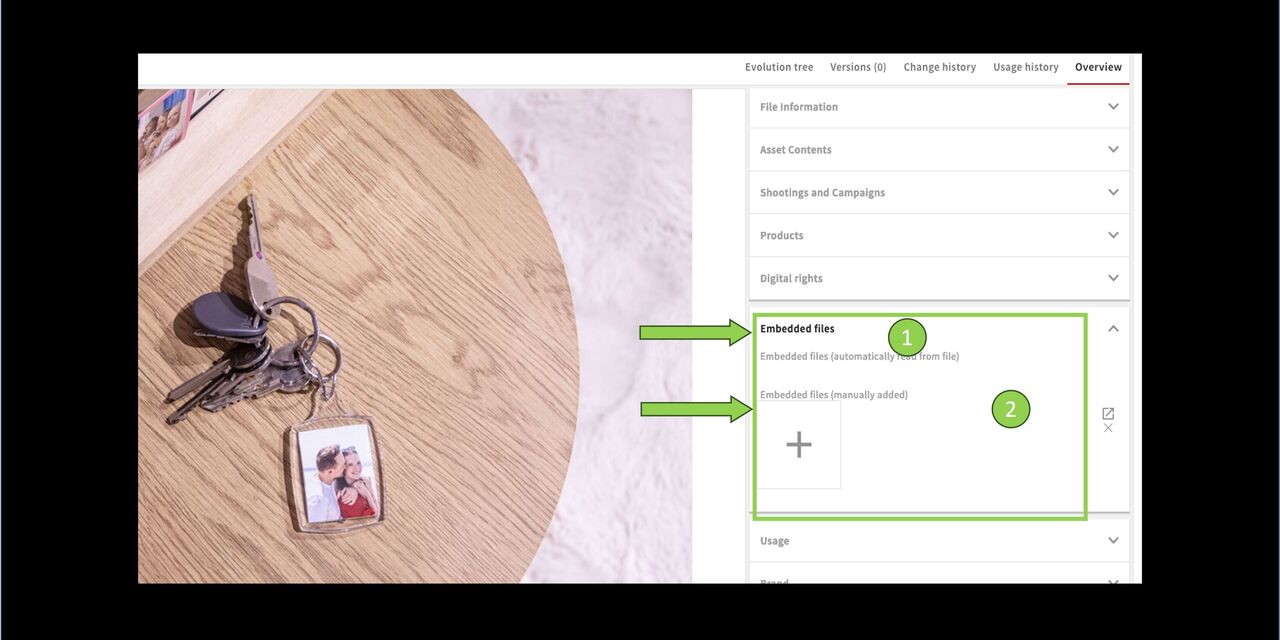
Add / embed file
Add the file to the metadata of the asset:
- embedded files
- embedded files (manually added) - click on the plus sign
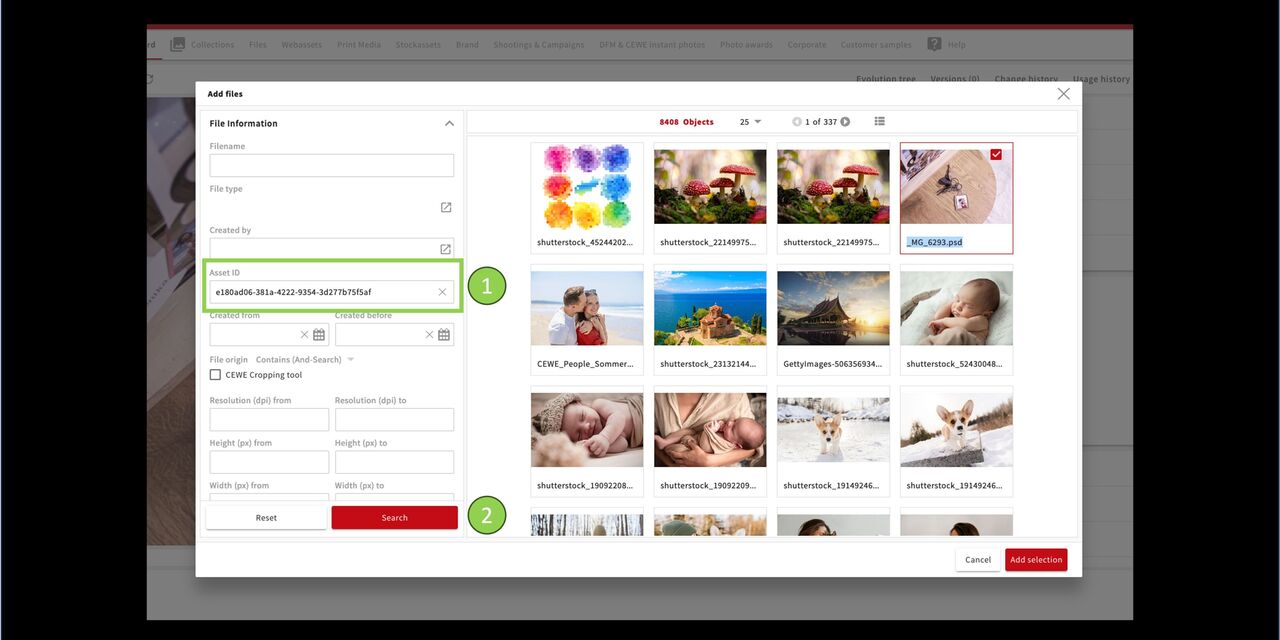
Search image
The CEWE MediaAssets search opens.
1 Enter the asset ID (or another metadata for searching). 2. Click on Search.
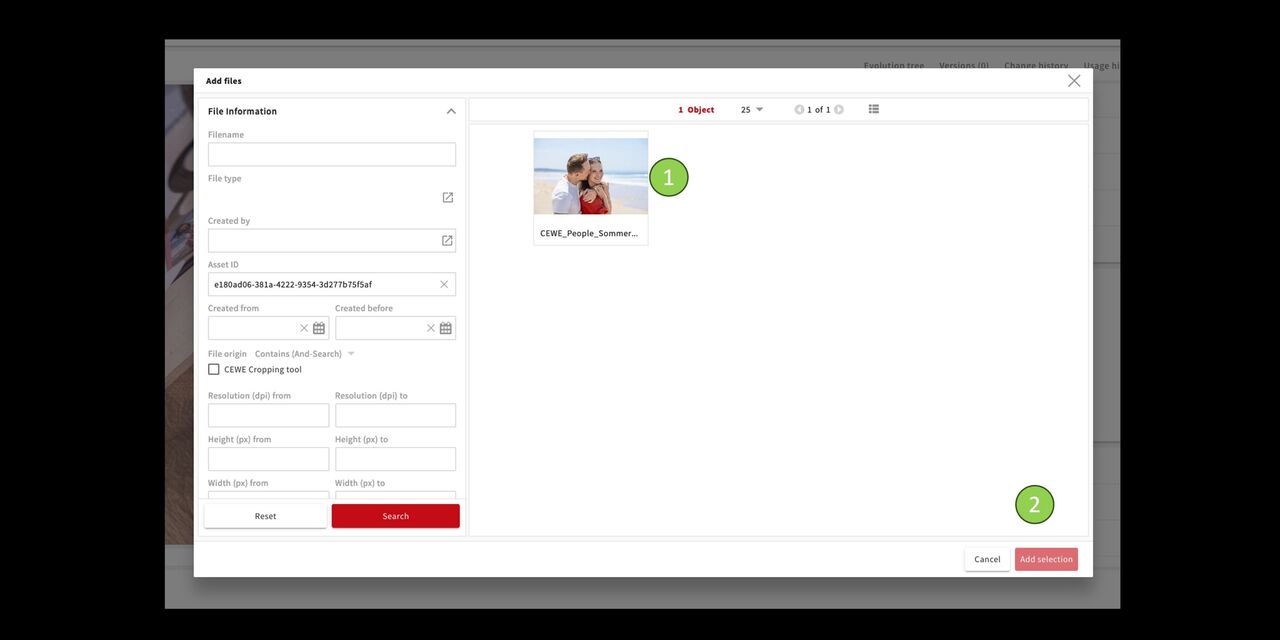
Add the image
- The image appears.
- Click on Add selection.
Done...
The image is now embedded. You can see it
- in the metadata
- in the embedded files

The other direction....
Now open the embedded image (simply click on the image in the menu on the left)
In the opened image you can now also see in the left menu that this image has been embedded in the product sample image.
See: Embedded in (manually...)
Search for linkings and embedded files
How we can use our search filters to check links or to find existing files that we would have created from scratch.
Intro
We can search for links and embedded files using our filters.
you can use the search for links to determine whether your uploads contain the intended links in the evolution tree without having to call up each file individually. Then you can correct or link manually if necessary.
you can use the embedded files search option to find files in which certain images have already been used, for example. This can avoid unnecessary extra work. An example will follow.
Search for links
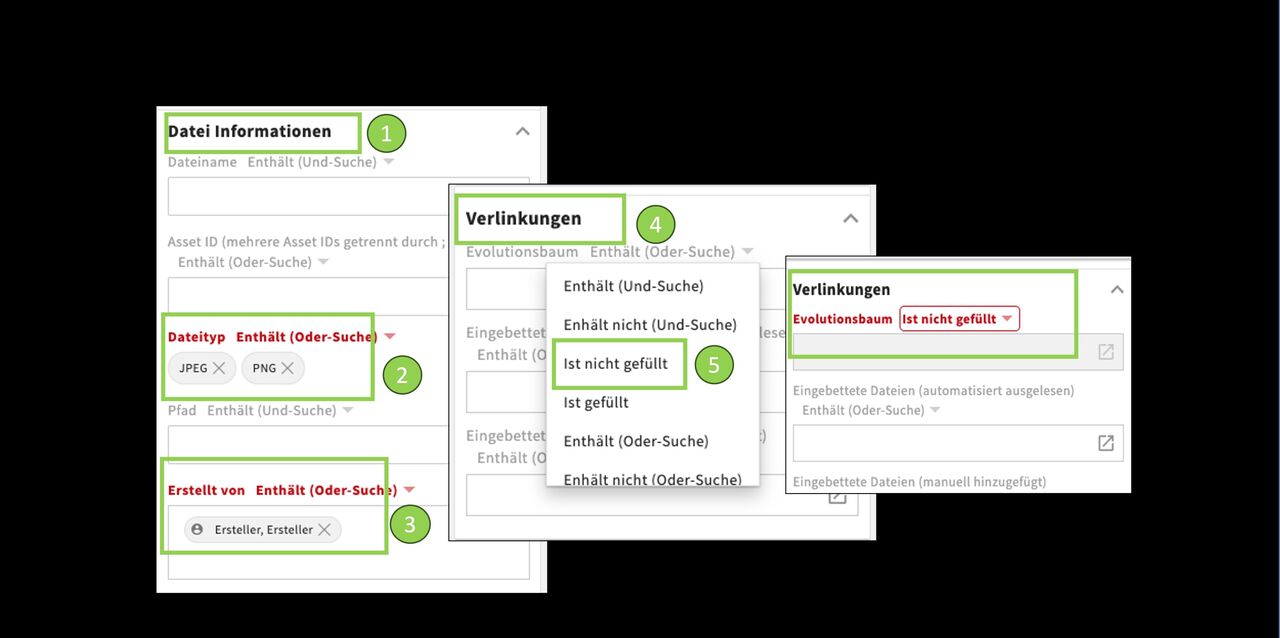
- In the search filters (Files section) go to File information.
- Select the file type you are looking for.
- Enter your name as the creator. You can also narrow down the time frame.
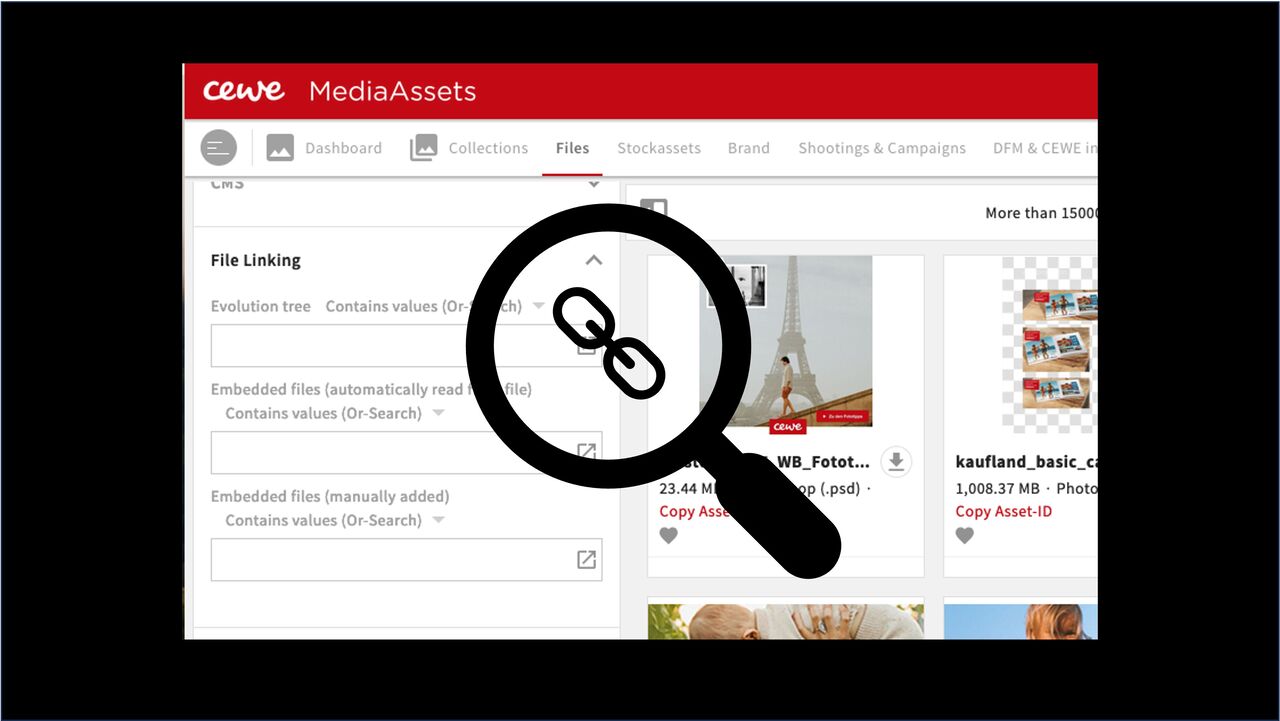
- Further down in the filters you will find the section File linking.
- Set the search filter in the Evolution tree field to not filled (to find files that have no links).
If you find files, you can now link them manually. If not, you have obviously linked correctly. (cross-check using the filter filled)
Search embedded files - an example:
You like the pool photos from the Kell family's summer shoot and would like to use them for calendar illustrations. Before you create new files, you can check whether material already exists.
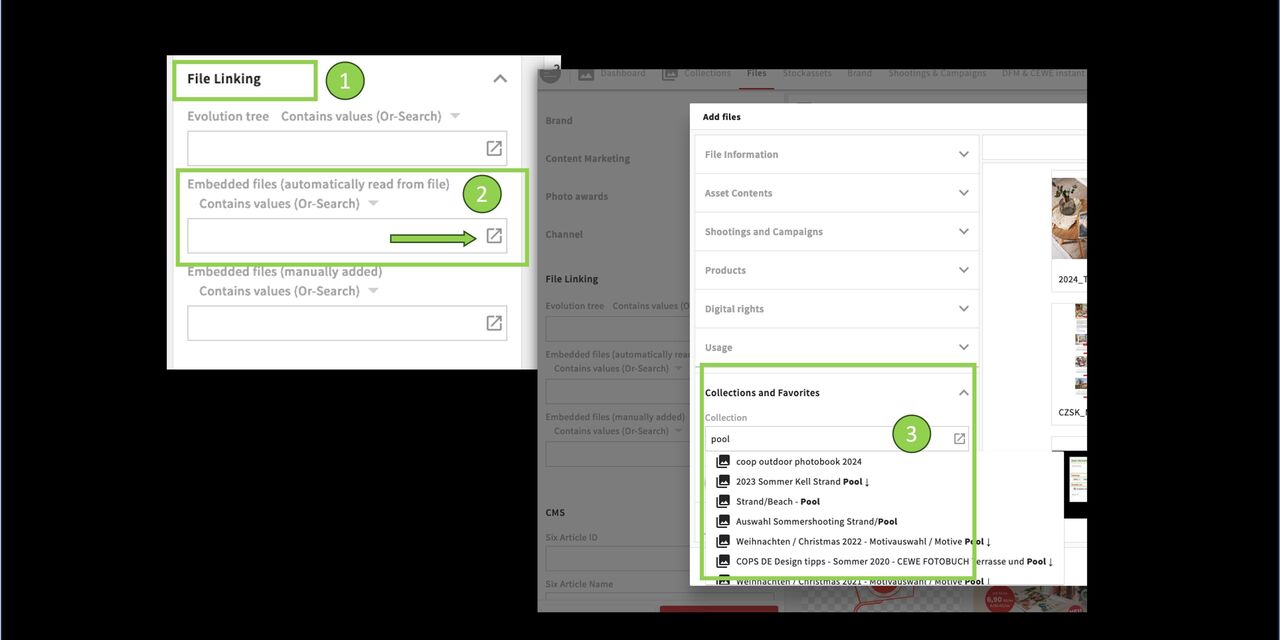
- Go back to File Linking.
- In the Embedded files field, click on the search box. The search opens in an extra window.
- In the search filters, go to Collections and favorites and enter a search term to find the corresponding files.
(Note: Works with automatically as well as manually embedded files)
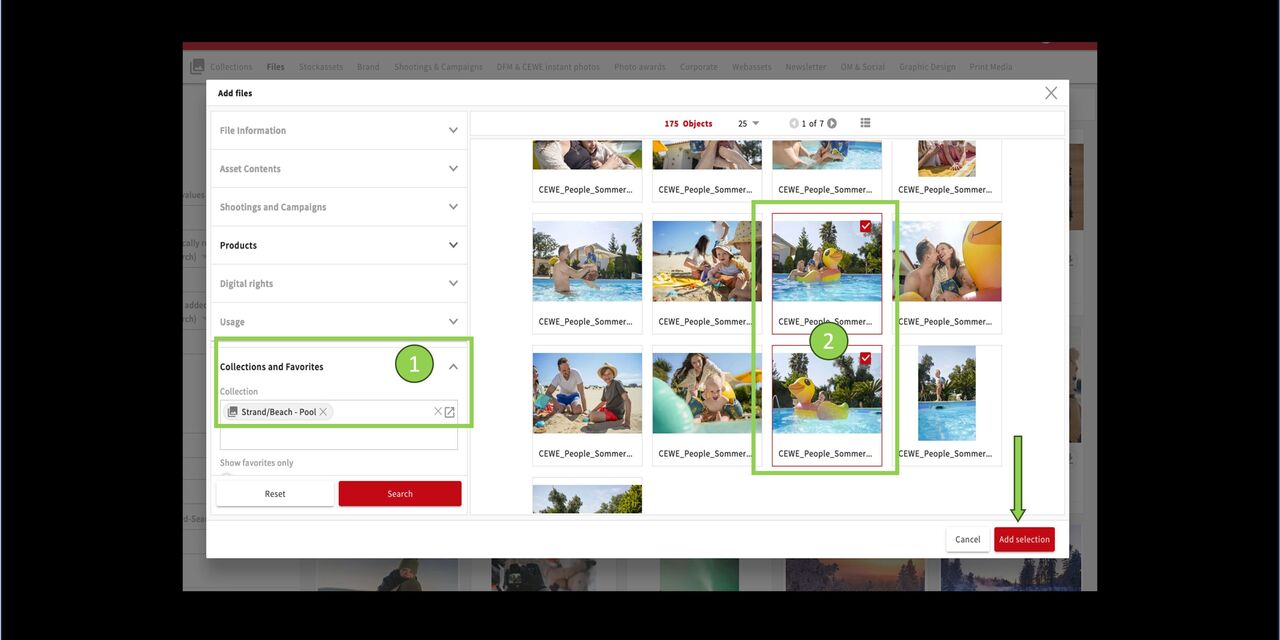
Select files
- You have opened the collection.
- Select the desired files and click on Add selection.
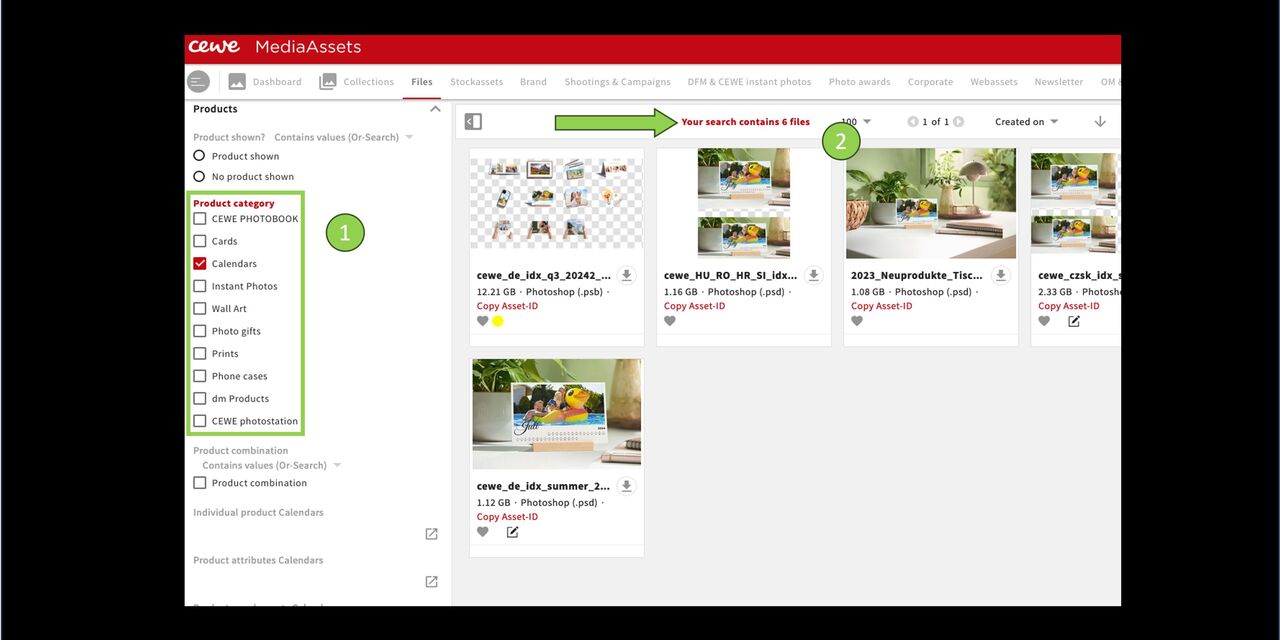
Result with product selection
- Use the product category to filter to select the desired product - here photo calendars.
- You will see all files in which the selected images have been used.
Of course, you can search with individual files as well.
FAQ Templates and Linking
When I have downloaded stock images from the stock image portal, do I have to upload them to MediaAssets first and then download them again before using them?
Yes, definitely! Otherwise the asset IDs are missing in the metadata and therefore cannot be read out.
If I create a template from a file that belongs to a collection, will it automatically appear in the same collection?
*No, they are created as the same asset type in the same folder, but are not automatically in the collection. So please add them to the collection.**
If I change the file name when creating a template, is that also the name of the file when I download it?
Yes, the name in MediaAssets is the actual name of the file when you download it.